How to use NPCs and Tags
The reason this article has been marked is: needs to be updated for new tag browsing interface
See NPCs to read the main article, with more complete and updated information
This is the Original HOWTO Step-by-Step tutorial on making and using NPCs.
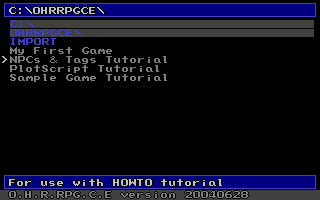
Okay. Start CUSTOM.EXE, and load up NPC_TAG.RPG. It is another pre-made tutorial.
Pick Edit Map Data and choose Map 00:
Pick Edit NPCs...
You will see a list of happyfaces. The first one is green. He is pre-made. Pick the second happyface on the list (the first yellow one)
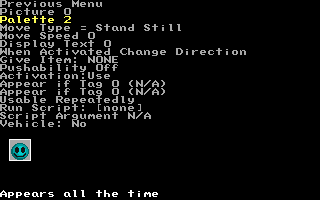
Change his Palette to 2 (light blue) so that you will be able to tell him apart from the other happyfaces.
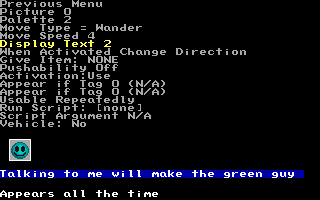
Change his move type. It determines how he will move around on the map.
The meanings of each move type are as follows. For a complete explanation of each type, press F1 in the NPC editor.
- Stand Still Just stands there
- Walk In Place Same as "Stand Still", but the NPC plays the walking animation as it stands.
- Wander Wander aimlessly and randomly
- Pace Walk straight until it runs into something, and then it turns around and walks back the other way
- Right Turns Walk straight until it runs into something, and then turn right
- Left Turns Walk straight until it runs into something, and then turn left
- Random Turns Walk straight until it runs into something, and then pick a new direction at random.
- The different Chase You and Avoid You options attempt to move towards/away from the player in various ways.
- Follow walls (Left/Right) [stop for others]: This is the method for finding your way out of a maze by following a wall with your left/right hand.
After choosing a move type, give the NPC a Move Speed. The move speed determines how many pixels the NPC moves each step. The player moves 4 pixels each step. Only values that divide evenly into 20 are available.
NOTE: You MUST set a move speed higher than 0 or else the NPC will not move, regardless of its move type.
Now set Display Text to 2. At the bottom of the screen you should see the words "Talking to me will make the green guy "
This is the first line of a text box that I pre-made using Edit Text Boxes on the main menu.
Now, when you use this NPC, text box 2 will be activated.
Pushability may be set if you want the player to be able to push the NPC around the map.
Activation can be set to change how the npc will be activated. In most cases, 'activation' will mean displaying a textbox.
- Use Normal activation. Press SPACE, CTRL or ENTER to activate the npc.
- Touch The NPC will be used automatically when you stand next to it, rather than waiting for the player to do anything.
- Step On You can walk on top of the npc, and it activates when you step on it. Good for either invisible step-on triggers, or set nothing to activate to have npcs like scurrying insects which you can walk on.
Now press ESC to go back to the list of happyfaces.
Pick the next NPC on the list.
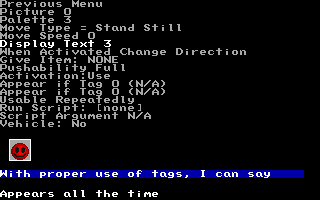
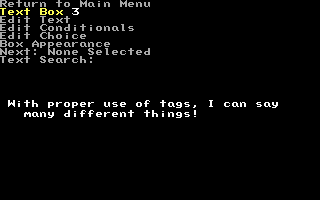
Set its Palette to 3 (red) and set its Display text to 3 ("With proper use of...")
Set any other stats as you wish, and press ESC.
Now pick the next NPC on the list of happyfaces.
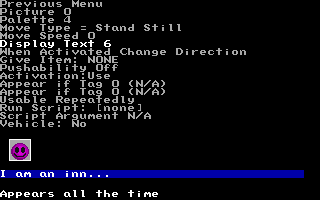
Make his palette 4 (purple) and his Display Text 6 ("I am an Inn...")
Now go back to the list of happyfaces.
You should see the green pre-made NPC, and the three NPCs that you just made; blue, red, and purple.
Now you are going to place these NPCs on the map.
Pick Place NPCs...
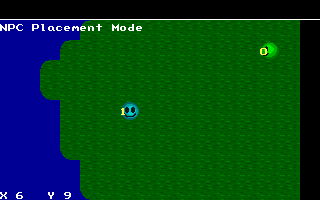
Now you should see a pre-made map. Your cursor is the spinning Green-happy. A green happy has already been placed on the map.
By pressing < and > you can change which NPC the cursor is. Press > once, and it will become your blue-happy.
The controls in NPC mode are as follows:
- Arrow keys move the cursor
- SPACE places a copy of the current NPC. SPACE again will remove it
- Hold ALT and press arrow keys to scroll the whole screen around.
- Hold CTRL and press arrow keys to place an NPC facing in a particular direction.
- CTRL Up places a copy of the current NPC facing north
- CTRL Down places a copy of the current NPC facing south
- CTRL Left places a copy of the current NPC facing west
- CTRL Right places a copy of the current NPC facing east
- (If you want to place two different NPCs in exactly the same place, you cannot do so with SPACE. You must use CTRL+arrowkey)
- Pressing ENTER either inspect and edit the NPCs on the tile under the cursor, if any, or otherwise edit the current NPC (the one selects with < and >)
- Press TAB to turn on and off a box that will show you what portion of the map you are looking at.
- Press Function keys to change editing modes.
- ESC returns to the menu
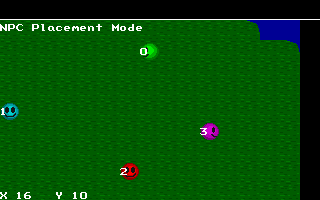
Place a copy of your blue-happy somewhere on the grass.
Press > again to select your red-happy. Place it, and repeat the process again for the purple-happy.
Now run GAME and load NPC_TAG.
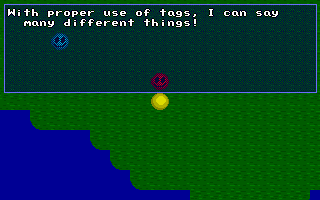
As you walk around and talk to the happyfaces, you will notice that they make a variety of claims which simply are not true.
- The blue-happy claims to make the green-happy disappear,
- the purple-happy claims to be an Inn,
- and the red-happy keeps repeating that he can say other things.
Next, I will show you how to make the happyfaces actually do these things.
Exit the program and run CUSTOM.
First, let's make the blue-happy remove the green-happy. This is done with tags. Pick Edit Maps, open Map 00, and pick Edit NPCs...
Pick the green-happy.
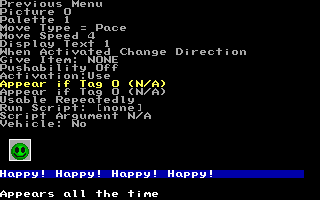
See the two lines that say Appear if Tag 0 (N/A) ? See at the bottom of the screen where it says Appears all the time ? - that is what Appear if Tag 0 (N/A) means.
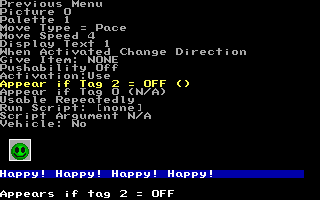
Change one of the two lines to Appear if Tag 2 = OFF (green smiley). (Keep pressing left to get conditionals checking for off tags, and right to check for on tags)
The game keeps track of thousands of little "tags", each of which can be OFF or ON. All tags start out OFF. That means that tag 2 should start out OFF, and as long as tag 2 stays OFF then the green-happy will exist, but the moment tag 2 becomes ON then the green-happy will disappear.
Now go back to the main menu.
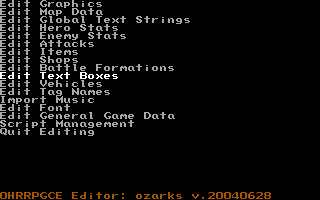
Pick Edit Text Boxes
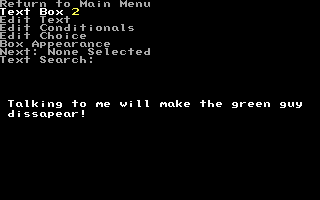
Now press right until you get to Text Box 2. You will see the text where the blue-happy is claiming to make the green-happy disappear.
Pick Edit Conditionals.
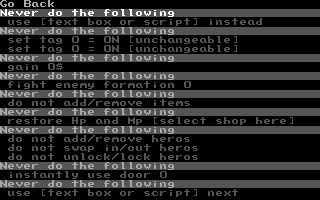
Look at where it says:
 Never do the following
  set tag 0 = ON [unchangeable]
  set tag 0 = ON [unchangeable]
Tag 0 is always OFF, and it is a special tag that can never be changed. Likewise, Tag 1 is always on. This means that the two set tag statement will never happen.
Pressing left and right will change the conditionals.
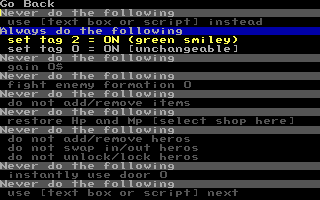
Change them to read:
 Always do the following
  set tag 2 = ON (green smiley)
  set tag 0 = ON [unchangeable]
Now, when you talk to the blue-happy, the game will check to see if it needs to do any of its conditional commands, it will see the Always do the following and it will know that it needs to set some tags. Tag 2 will be turned ON.
Now, since tag 2 = ON, the green-happy can no longer exist. Poof! he is gone.
Why are there two set tag commands? That's just in case you want to set two tags at the same time with a single text box.
Now to make the Red-Happy say different things.
In Edit Text Boxes press right until you reach Text Box 3.
Pick Edit Conditionals.
Look at where it says:
 Never do the following
  use [text box or script] instead
Quite obviously, this does nothing.
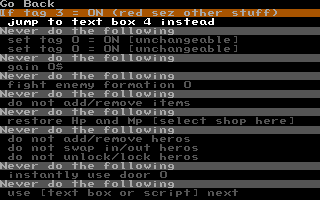
Change it to read:
 If tag 3 = ON (red sez other stuff)
  jump to text box 4 instead
Now, remember that tags start OFF, so the jump still isn't taking place.
Just like with the blue-happy, change the second "If-Then" to:
 Always do the following
  set tag 3 = ON (red sez other stuff)
  set tag 0 = ON [unchangeable]
Now, the first time you talk to the red-happy, the jump will be ignored, and tag 3 will be set to ON.
The second time you speak to the red-happy, the first If will be true because tag 3 is now ON. Text box 4 will be displayed instead of text box 3.
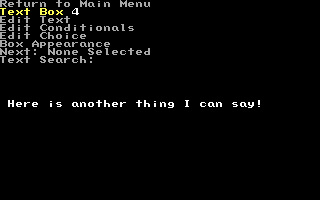
Now press ESC, and move right to text box 4.
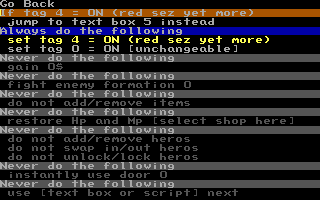
Change the first two conditionals to:
 If tag 4 = ON (red sez yet more)
  jump to text box 5 instead
 Always do the following
  set tag 4 = ON (red sez yet more)
  set tag 0 = ON [unchangeable]
Voila! Now the red-happy can say three different things in a row!
So where are those names coming from? Like "red sez more stuff"? On the main menu you can pick Edit Tag Names and give names to the tags so it is easy for you to remember what they mean in the game.
Now to make the Purple-happy an Inn.
In Edit Text Boxes move right to text box 6.
Pick Edit Conditionals
The sixth conditional says:
 Never do the following
  restore Hp and Mp [select shop here]
By pressing left several times, change it to:
 Always do the following
  go to an Inn that costs 5$
Had you pressed right, you would have changed it to a shop, if there were any defined in the RPG file.
Now, when you speak to the purple-happy, he will be an inn that costs five bucks!
Now run GAME and test it all!
See Also[edit]
- How do I check for more than 2 tags at once?
- HamsterSpeak Issue 22: The Mighty Fine NPC (and His Many Friends)
Getting Started | Making Maptiles | Making Walkabout Graphics | Importing Graphics | Map Construction (Animating Maptiles) | NPCs | Text Boxes | Tags | Making a Hero | Items | Customizing Menus | Vehicle Use | Sound Effects | Distributing a Game
Battles | Stun, Regen, Poison, and Mute | Bosses | Making Complex Attacks | Combat Dialogues | Enemies that respond to a certain attack | Ways to refer to a hero in a script | Creating Dungeons | Conditional Door Links | Permanent Stat-Boosters | Creating Cutscenes | Using the Mouse in the Game | Making Android games


