NPCs
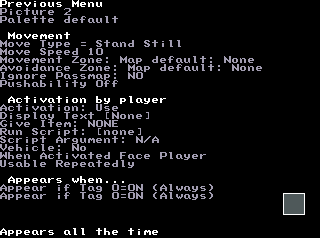
In case you don't know, NPC stands for Non-Player-Character; In other words, generic townspeople, shopkeepers, and the like.
In the OHR, NPCs are also used for all interactive objects on maps, including treasure chests, pushable scenery, openable doors, vehicles, triggers that you step on (aside from doors), non-random enemies that you talk to or bump into to fight, and anything else required.
NPCs can be invisible, moving, pushable, animated, show textboxes, and give or take items, and most importantly are also the main way to trigger larger events without the use of plotscripting.
Moving NPCs can wander the map freely (respecting walls) unless allocated movement and avoidance zones.
NPCs will be shown on the map using spritesets from Walkabouts in the Graphics Editor.
When drawing or importing walkabouts in the editor, keep one walkabout set blank to use for invisible NPCs.
Because NPCs sprite can cycle through eight frames, they are the simplest way to add animations to a game, however, due to instance limits per map, animated tiles are sometimes better suited for this task.
Read the Animating Maptiles article if you'd like to make maps with large moving areas such as swaying forests or water.
To create NPCs, first you create an NPC definition, and then you place copies (instances) of the NPC on the map. For example you can create a grandfather clock NPC and put several clocks on your map. NPC definitions are created inside the map editor. NPC definitions can be either Local (specific to one map) or Global (shared by all maps).
(Beware that there's current a limit on NPC instances per map of 300. It's better not to use lots of NPCs as step-on triggers over a large area. Use Zones and scripts for that instead.)
This article tells you about the different things NPCs can do directly, but to really make use of them you'll combine them with Tags and Text Boxes.
Speed and Movement[edit]
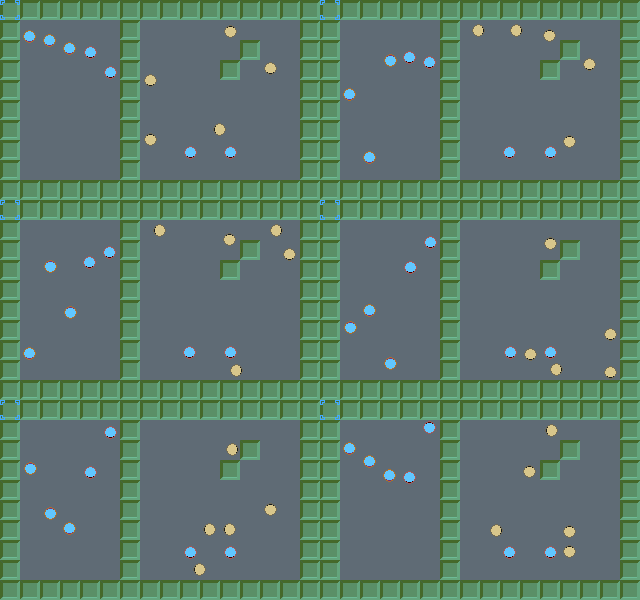
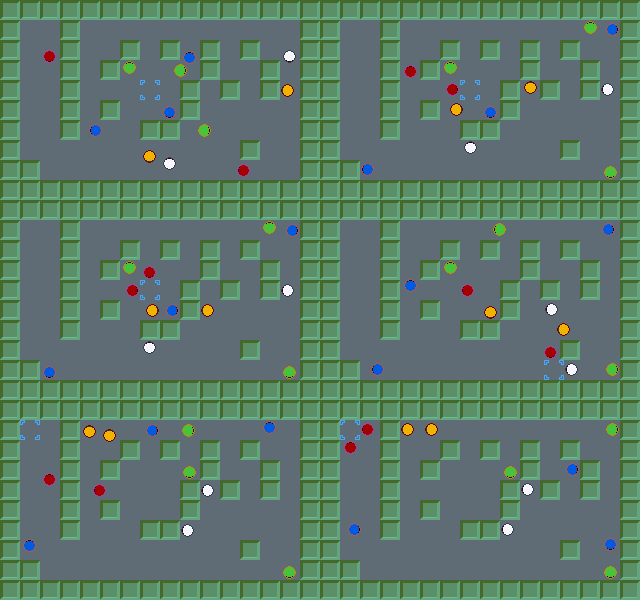
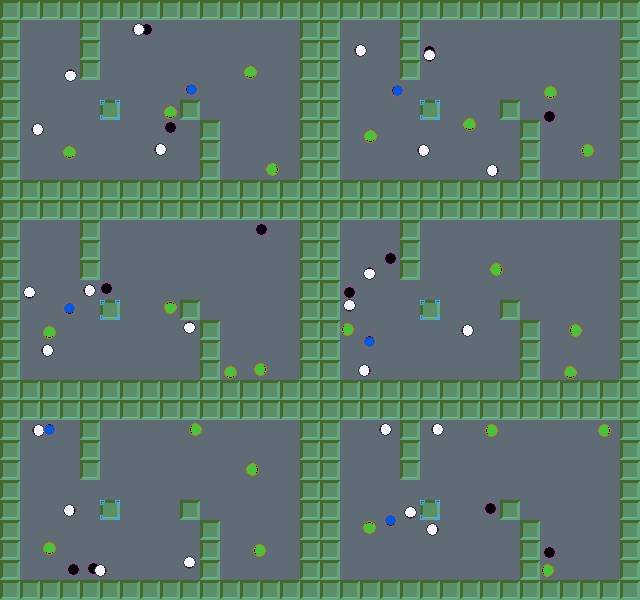
Speed and movement type determines how all instances of that NPC will move around on the map.
If you're unfamiliar with NPC bitsets such as movement speed, it is recommended to make some rudimentary NPC's on a map and use Test Game to compare how various settings work.
The meanings of each move type are as follows.
Stand Still Just stands there, facing the direction specified when placed on the map.
Walk In Place Same as "Stand Still", but the NPC plays a two-frame walking animation as it stands.
Wander Moves aimlessly and randomly.
Pace Walk straight until it runs into something, and then it turns around and walks back the other way.
Left Turns or Right Turns Walk straight until it runs into something, and then always turns in the specified direction.
Random Turns Walk straight until it runs into something, and then pick a new direction at random.
The different Chase You and Avoid You options attempt to move towards/away from the player in various ways. They will work correctly across wrapping map edges.
Direct - attempts a stright line of movement towards/away from Hero, doesn't make any random decisions, stay still when stuck behind obstacle. Tend to get caught a lot.
Meandering - like direct, will attempt to reach/escape the Hero with direct path, but once on the same X row or Y column, will move a tile at random.
Pathfinding (chase only) - Finds the shortest path to the Hero, or nearest possible tile, and navigates around obstacles, but does struggle with very large mazes. Wll repect zone restrictions. The path is recomputed with every step.
Follow walls (Left/Right) [stop for others]: This is the method for finding your way out of a maze by following a wall with your left/right hand.
The move speed determines how many pixels the NPC moves each step. The player moves 4 pixels each step. Only values that divide evenly into 20 are available (0,1,2,4,5,10). This speed setting has no effect on rotation speed (e.g. NPCs turning in a one-tile box)
NOTE: You MUST set a move speed higher than 0 or else the NPC will not move, regardless of its move type.
Zone Movement[edit]
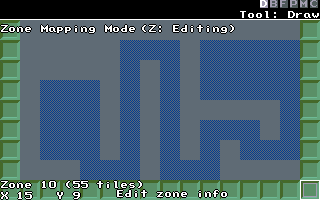
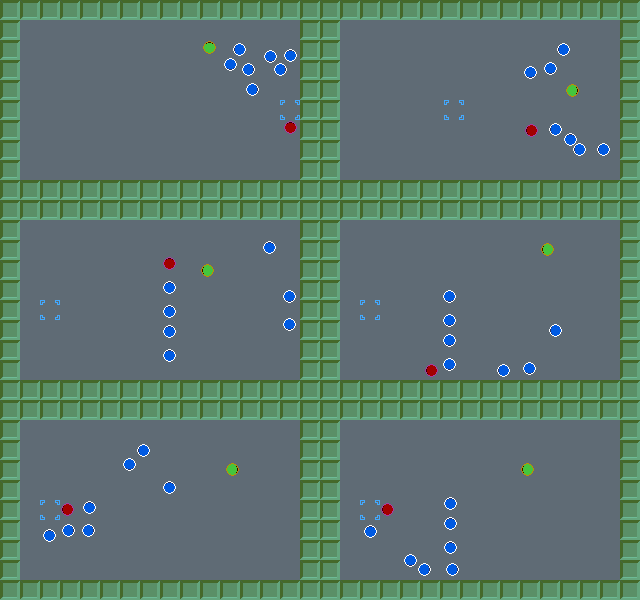
It is possible to control NPC movement further by adding zones to your map in the Map editor.
NPCs can be set to adhere to or avoid specific zones that have been marked on the map. These zones are not seen in-game, and are a useful way to prevent an NPC from wandering away too far. This is also method of making a wall that NPCs can't pass, but Heros can.
Mark all the tiles that an NPC can't step on, and set that zone as the "Avoidance Zone" setting in the NPC editor (or as the default Avoidance Zone in the general map settings). Alternatively you can mark the only tiles which the NPC is allowed to step onto, and use the "Movement Zone" setting.
Or you can use both settings at once, useful if you want to reuse some general zones for different NPCs.
In the example shown, the Red NPC aggressively pathfinds its way to the hero(cursor), while the blue follow walls' easily finds the same path and would continue to pinball back and forth along the zone. Green's random wander doesn't easily navigate the zone's narrow exit.
NPCs also won't step on step-on activated NPCs.
Activation by Player[edit]
Pushability may be set if you want the player to be able to push the NPC around the map. In which case movement speed will adjust how easy the NPC is to push.
Next, NPCs can be 'used' by the Hero, which doesn't interfere with pushability.
Use While on the neighboring tile key-press activation. Press SPACE, CTRL or ENTER to activate the NPC.
Touch The NPC will be used automatically when you stand next to it, rather than waiting for the player to do anything.
Step On You can walk on top of the NPC, and it activates when you step on it. Good for either invisible step-on triggers, or set nothing to activate to have npcs like scurrying insects which you can walk on.
Activation can be set to change how the npc will be activated. In most cases, 'activation' will mean displaying a textbox, you can also choose it to cause the NPC to turn to face the player, either temporarily or permanently set to that new direction, with When Activated.
Usability is also one-time or repeatedly. Note that this is true for all instances of this NPC on the map, therefore laying three copies of a Usable only once NPC and using one would cause all three to disappear. To prevent this you have two choices, either each would have to be made separately in the NPC editor, or use the delete NPC script command instead of tags.
(you may have noticed there is a number displayed next to the Usable: onetime setting, this is unique to every NPC and is an ID used for plotscripting purposes)
NPCs: Event Triggers[edit]
NPCs perform many roles and connect other aspects of the game to the map to perform more complex tasks, for example:
- [Give Item...> Items] To make treasure boxes or items on the ground.
- [NPC Activation(use/step-on/touch) + When Activated...change direction/face player/no not face player] As interactive map objects/scenery.
- Use NPCs as Vehicles.
- [NPC Display Text...> Text Boxes] Townspeople you can talk to / displaying notifications.
Text boxes however have many additional functions under the bitset conditionals, and can perform these either after or instead of showing a text box. NPCs linked to text boxes can therefore indirectly perform all the same functions. Examples of their possible use in a game:
Text Boxes conditionals ...
- [open shop / restore Hp&Mp] Shop to buy/sell, Inn to heal.
- [add/remove item] To give as well as remove items from the Hero's inventory.
- [start battle]Non-random enemies that you talk to to fight.
- [add/remove swap in/out lock/unlock hero]A Hero who has not yet joined your party.
- [instantly use door#] Waypoint/teleport to preset location.
- [save game / delete saved / load game / end game]
- [open menu]
- [set Tags]
- [run script]
As a shortcut, you can access the Text Box Editor from inside the NPC editor when selecting to display a text box. This means you can create new text boxes without having to navigate back and forth between menus, and can use the Right-mouse click on the list for an option to edit an existing text box. This is possible for most selections made across Main Menu items.
Tags[edit]
If you haven't encountered them before, tags are really simple but achieve a lot. A tag is a simple true-false conditional. It can be used to determine whether it is true or false that:
- you have an item
- you are talking to a specific NPC
- you have accomplished a certain task
- you are riding a specific vehicle
They can be toggled true-false automatically, such as made to detect items in your inventory, or customized and manually triggered through an NPC > Textbox:conditional. Tags are a way of keeping track of what events have already happened in your game, and making changes accordingly by enabling or disabling things.
The first two tags, 0 and 1 are special. Tag 0 is always True/ON and Tag 1 is always False/OFF. When the game starts all of the other tags begin as false/OFF.
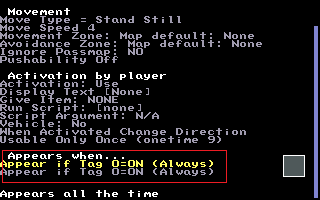
Tags can be used here to enable or disable an NPC on the map.
Create two NPCs:
(1) set one that gives you an item (either directly or via textbox) > make the item set tag 2 when it's in your inventory; and
(2) an NPC set to appear only if tag 2 is set.
Place the two NPCs on the map.
Use Test Game and talk to NPC(1) to obtain the item.
NPC(2) will appear.
This basic principle can be applied to a host of game aspects... you can make an NPC that is impassable until a switch is triggered removing it, a shop that will only open if a battle is won, a character that says one thing and something else later on.
Map Editor: NPC mode (F5)[edit]
While placing NPCs on the map in the map editor the controls are as follows:
Press < and > to cycle through the Map's list of NPCs to place.
SPACE places a copy of the current NPC. SPACE again will remove it
Hold CTRL and press arrow keys to place an NPC facing in a particular direction. CTRL+Up places a copy of the current NPC facing north, CTRL+Down south, CTRL+Left west, CTRL+Right east.
(If you want to place two different NPCs in exactly the same place, you cannot do so with SPACE. You must use CTRL+arrowkey).
Pressing ENTER either inspect and edit the NPCs on the tile under the cursor, if any, or otherwise edit the current NPC (the one selected with < and >)
See Also[edit]
- How to use NPCs and Tags (Old Step-by-Step guide)
- How do I make an NPC say something different later?
- How do I make a battle start after talking to an NPC?
- How do I make a wall that heroes can't pass, but NPCs can?
- NPC references (for plotscripting)
- Will you raise the limit on number of NPCs?
- How can I trick the Npc limit?
Getting Started | Making Maptiles | Making Walkabout Graphics | Importing Graphics | Map Construction | NPCs | Text Boxes | Tags | Making a Hero | Items | Shops | Customizing Menus | Battles | Stun, Regen, Poison, and Mute | Sound Effects | Animating Maptiles | Zones | Vehicles | Distributing a Game
Bosses | Making Complex Attacks | Combat Dialogues | Enemies that respond to a certain attack | Ways to refer to a hero in a script | Creating Dungeons | Conditional Door Links | Permanent Stat-Boosters | Creating Cutscenes | Using the Mouse in the Game | Making Android games