Text Boxes

Main Menu > Edit Text Boxes
Textboxes are just that - boxes of text that appear on the screen to tell the user something. Text boxes can be used for story, NPC dialogue, displaying information, and credits. Wait, textboxes can do so much more! Besides displaying text, text boxes are used to trigger effects and use Tags to perform conditional logic without the use of scripting.
Boxes of Text[edit]

Textboxes display text on the screen until the player uses a key press or click to continue.
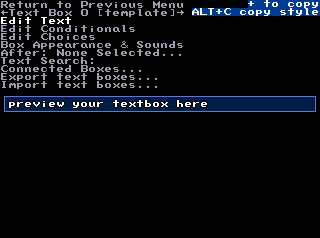
Go to "Edit Text", press ENTER and start typing. You can type 38 characters per line, and up to 8 lines in a single textbox.
Don't worry if you run out of space. You can create multiple textboxes and link them together.
There are some special codes that you can put in your text boxes which will be converted into variable text such as hero names or special numbers. This is particularly useful as players can be given the choice to rename their characters.
${C0} = Leader's name
${C#} = Hero name at caterpillar slot #
${P#} = Hero name at party slot #
${H#} = Name of hero ID #
If plotscripting, these are also some useful codes:
${V#} = Global plotscript variable ID #
${S#} = Insert String variable with ID #
Linking NPCs to text boxes[edit]
The most common way to open a text box is to attach them to an NPC that the player can interact with. So let's cover that first, before diving further into all their other features. Go read the short article, Creating Chests.
Or if you want a tutorial that's much longer, more hands-on (includes a sample game to edit), and amusingly out of date, follow this classic tutorial, which is still useful today not to mention very nostalgic for long-time users: How to use NPCs and Tags
Appearance & Sounds[edit]
Alternative box edge designs can be drawn or imported in the Graphics Editor. Game font can also be customized. See Fonts.
You can change the box style, make the box itself invisible, change text colour, and position the textbox on screen. As well as that you can add sound effects and a portrait graphic to your textbox. You can also stop and change the music.
If selected, Backdrop images will cover the entire screen when the textbox is called.
It is recommended to reserve the first boxes on your list as templates for the various styles you'll want to replicate often, therefore ensuring consistency and saving you time.
Chaining[edit]
Chaining is commonly used when you try to fit too much text in a text box. Make the first text box, type in what you want it to display (try not to end the box in mid-sentence, it will make it seem messy) when it is full, create another textbox with the rest of the info. Then chain them together.
Chaining is also useful in plotscripts. If you wanted a conversation in a plotscript, you'd have to add a whole lota, "show text box" and "wait for text box." But if you want to skip all those commands, you can just make the whole conversation, then chain them. So in the plotscript, you only have to put the first "show text box" command, and only one "wait for text box" command.
Conditionals & Tags[edit]

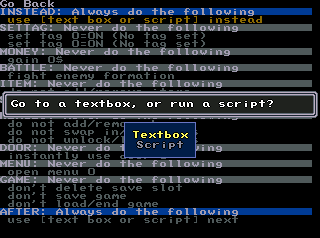
Textboxes do more than display text and graphics. Using Conditionals, text boxes can:
[ run script ]
[ set tags ]
[ open shop / restore Hp&Mp ]
[ add/remove item ]
[ start battle ]
[ add/remove swap in/out lock/unlock hero ]
[ save game / delete saved / load game / end game ]
[ open menu ]
These conditions are controlled by tags that determine whether or not something will happen. The two basic settings are "Never" and "Always" and you can also make custom tags that can be toggled on and off. (Read What are Tags for? for a full explanation of how to use tags)
Press ENTER to go to the tag browser. If you want the condition to be reversed, press MINUS or left arrow. Press BACKSPACE or DELETE and it will return to default.
Keep in mind it is not currently possible to autoskip displaying the visual portion of a text box and only run it's additional functions. This means that without plotscripting, textbox will wait until the player has clicked or pressed a key before proceeding.
Take special note that a text box will perform it's functions in the listed order, if the INSTEAD conditional is performed, all following commands are missed; This is also true of SETTAG which will take effect immediately and can interfere if the tag is used by proceeding conditionals.
Text box conditionals are the only way to perform some of these functions without the use of plotscripting, such as to open a shop in game.
Making Choices[edit]
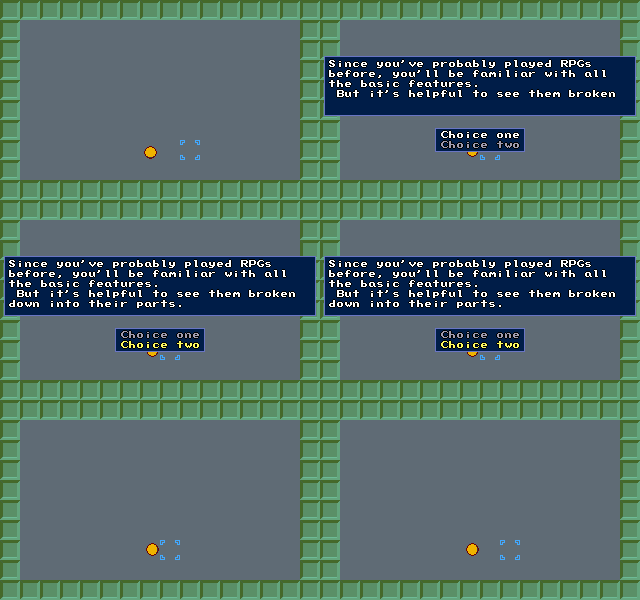
If choices are added to a text box the player is able to select one of two options, which will set a chosen tag.
If you want to make text choices, you first make a tag. Name it "text choice". Go to "edit choices" in the text box editor. Make your choices. Go to the conditionals and make the first one "If tag #(text choice)=ON" and chain it to the box if you say yes. On the next one, you make it so it says (on the conditionals) "If tag # (text choice)=OFF" and chain it to the text box that will come up when you say no.
If you'd like to give the player more than two choices, or for their selection to perform functions other than set tags, use Menus instead.
Portrait Boxes[edit]
You can add portraits to your text boxes too. Draw them in Edit Graphics/Draw Portrait Graphics. (Portraits can also be assigned to heroes, and will appear on their status screen.)
You can choose to add a border to the portrait and it will appear as the same border around your text box. You can also place the portrait anywhere on the screen, including inside the text box.
There are three ways to attach a portrait to a text box:
Fixed - attaches a graphic to the text box based on it's order in the graphics editor. It won't change regardless of your hero's rank or formation. It's useful when you have a text box spoken by a set character like NPCs, villains, and locked heroes. It also works well with the ${H#} string in the text box when you want a specific hero to talk and still use the name given to them by the player
Hero (by caterpillar order) - attaches a graphic to a text box that will change depending on your party's order. The portrait ID can be set as 0-3 which corresponds to the rank in the active party. For example, if the portrait ID is set to 2, then the portrait box attached to the hero that is third in the active party will be displayed with the text box. When used in tandem with the ${C0} and ${C#} string functions, you can have the heroes interact with the story without worrying about who the player has in the party or what order.
Hero (by party order) - works just like the Hero (by caterpillar order), only it is not limited to just the active party but your reserves as well. The portrait ID can be set to 0-40 with 0-3 being the active party while 4-40 being any heroes in your reserves. You can use the ${P#} string function in the text box to call on the names of heroes in your reserves.
Getting Started | Making Maptiles | Making Walkabout Graphics | Importing Graphics | Map Construction | NPCs | Text Boxes | Tags | Making a Hero | Items | Shops | Customizing Menus | Battles | Stun, Regen, Poison, and Mute | Sound Effects | Animating Maptiles | Zones | Vehicles | Distributing a Game
Bosses | Making Complex Attacks | Combat Dialogues | Enemies that respond to a certain attack | Ways to refer to a hero in a script | Creating Dungeons | Conditional Door Links | Permanent Stat-Boosters | Creating Cutscenes | Using the Mouse in the Game | Making Android games