Getting Started
Welcome to the Official Hamster Republic Role Playing Game Construction Engine.

Custom will allow you to make games without use or knowledge of any scripting or programming language. It is also possible to create non-RPG games. There is no limit to how simple or complex a game can be.
The following HOWTO pages will provide an overview of the basics, signpost main areas of the OHRRPGCE, and provide short follow-alongs to start you on your game making journey.
You can also learn by studying someone else's game files. Download Wandering Hamster or another RPG to open it and try messing with things. Some people find it easier to learn when they edit a pre-existing game (but remember! Just because someone didn't put a password on their game, don't take that as a license to steal graphics and things for your own game without permission. James left Wandering Hamster unpassworded so people could look at it for educational examples. There is nothing wrong with learning from someone else's work, but using someone elses work as if it was your own is wrong.)
If you haven't already, download the OHRRPGCE from here, or here ohrrpgce-win-installer.exe. If you don't know how to install software, we have provided a walkthrough for you.
Run CUSTOM
Interface Scaling[edit]
If you have a high DPI monitor or otherwise find the default interface of CUSTOM too small to comfortably read, you can press F9 to open the Global Editor Options menu. You can select your preferred zoom level on this menu.
New Game[edit]

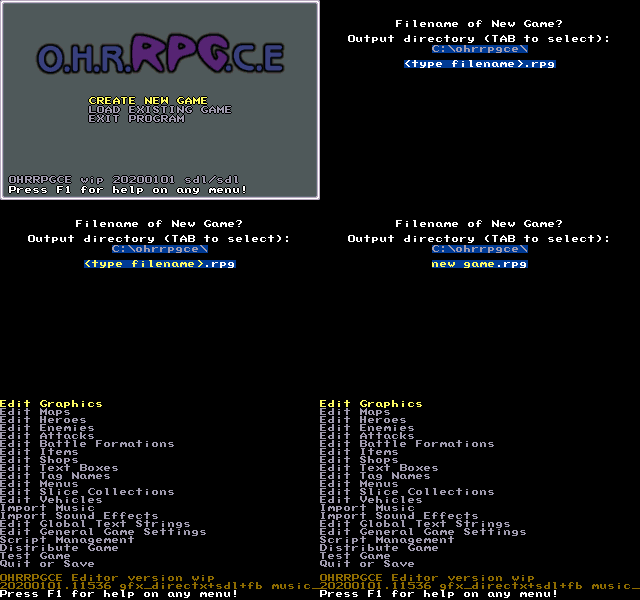
We will assume that you are going to create new game. Choose create new game
Type in a name for your game. This name was once limited to 8 letters because OHRRPGCE is a DOS program, but this is no longer the case. The game can be renamed later in Edit General Game Settings > Long Name:
Explore through Custom's various menus to see what is possible using the built in standard features. And look in places like Example Scripts to fake features that don't exist yet.
Note that Custom was originally designed to be used entirely by keyboard, not mouse. Navigating the menus and selecting options are all easier using arrow keys, space-bar, Esc, etc.
There are often a lot of options on a menu, and some options have sub-menus and sub-sub-menus. If all the menus and options are too overwhelming, know that some of these features you will never use, most you can completely ignore. For example not every game will use battles or vehicles, and most things will work without changing the default settings.
F1 and Test Game[edit]

You can Press F1 on any menu to access a help screen that shows the keyboard controls specific to that menu, and/or explains the options on each menu.
Information from F1 will be more reliable and up to date than the wiki. We can't stress enough how useful F1 is, use it!
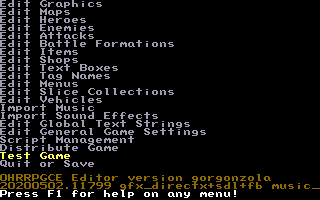
Test Game. Located near the bottom on the Main Menu, Test Game will open a second window which lets you see your game from a player's point of view. This is helpful for playing with features and experimenting to see what effect different changes you make will have.
Test Game will auto-update any changes made in the editor (sometimes you have to leave the menu in Custom for the change to save and take effect)
The first screen you see will be white/blank (you haven't drawn any graphics yet!), press any key to proceed. (Another blank screen? you haven't made a map yet!)
[edit]
But not everything is possible with Custom alone, and after you are familiar with Custom, you will likely want to explore creating unique special effects, this would be done using Plotscripting. Plotscripts are written in a simple easy to learn scripting (programming) language called HamsterSpeak. People who want to learn HamsterSpeak can read these resources starting with the Tutorial.
If you get stuck on something, and can't find the answer from F1 or the wiki, ask for help on the Forums
What Next? Overview of the Basics[edit]

Start with making a few basic graphics (this is covered in the next chapter).
Everything the player (hero) interacts with on a map, such as other characters, chests, or objects, are called NPCs (drawn in the walkabouts graphics editor). Assemble NPCs on the Map Editor to make interactive maps.
NPCs can be animated, invisible, moving, pushable, show textboxes, and give or take items, and most importantly are also the main way to trigger larger events (all covered in more detail later on).
NPCs link to textboxes to show text such as dialogue or notifications, however, textboxes have many other uses.
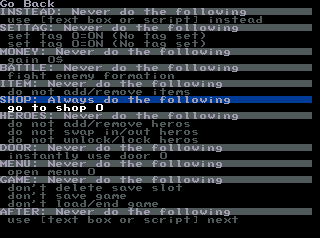
In fact textboxes are the true bones of an OHR game. It is by re purposing a textbox that NPCs trigger larger events, including triggering scripts, shops, doors, opening menus, starting battles, adding removing or swapping heroes, moving money or items, setting tags and ending the game. Use textboxes to string together cause-and-events.
Afterwards, conditionals would be added with tags, using 'If > Then' structure.
Beyond this, you must decide what your game type will be, the story and what the player will do in game.
Read the next few chapters detailing more of the above, follow along with the guided instructions. And then perhaps move onto plotscripting when you're ready!
See Also[edit]
Getting Started | Making Maptiles | Making Walkabout Graphics | Importing Graphics | Map Construction | NPCs | Text Boxes | Tags | Making a Hero | Items | Shops | Customizing Menus | Battles | Stun, Regen, Poison, and Mute | Sound Effects | Animating Maptiles | Zones | Vehicles | Distributing a Game
Bosses | Making Complex Attacks | Combat Dialogues | Enemies that respond to a certain attack | Ways to refer to a hero in a script | Creating Dungeons | Conditional Door Links | Permanent Stat-Boosters | Creating Cutscenes | Using the Mouse in the Game | Making Android games

