Battles

The reason this article has been marked is: the information is largely out of date, especially in the "Making Attacks" section.
Okay. Now lets show you how to set up battles. There are alot of steps. Use the game SAMPLE.RPG. It is a single simple map, with some pre-made graphics that you can use to learn to make battles.
Start up CUSTOM.EXE and pick SAMPLE from the menu.
Global Text Strings[edit]
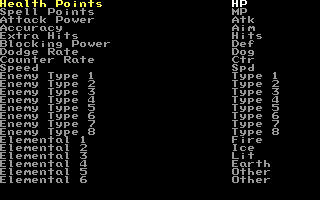
First, you should give all of the stats names. Pick Edit Global Text Strings.
You will see a list of stats, as well as every other string that might appear while playing your game. For each of them, press ENTER, and type in a name for the stat. They have default names, but the defaults aren't very good. Go ahead and name them. You can give the enemy types and elementals names too and use them later in the bitsets for heroes, enemies, and attacks.
Editting the Heroes[edit]
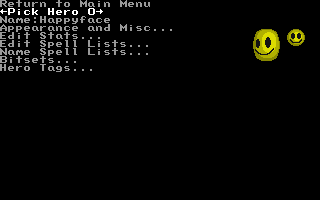
Okay. Now go back to the main menu, and pick Edit Hero Stats.
You should see HappyFace (what is this thing I have with happyfaces?)
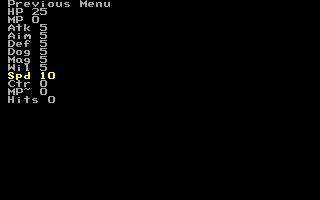
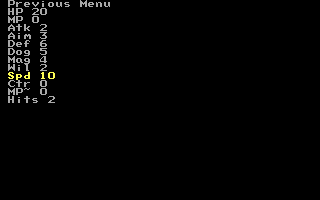
Pick Edit Stats... Now, you will see all of the stat names, along with numbers. The numbers on the left are the character's abilities at level 0, and by level 99, the character will have built up to the numbers on the right.
Normally, you would want small numbers at level 0, and high numbers at level 99. Of course, if you want your character to get weaker over time, then you can do that too. If you have played Final Fantasy II, you might have noticed that Tellah loses strength with each levelup.
Anyway. Pick some numbers. You will probably want to re-adjust these numbers if your character is too strong or too weak in battle. Remember, these are only the values the hero will have when unequipped.
You can fix them later if your heroes are doing 1 damage per hit... or thousands... or dying instantly... or never dying...
This is the meaning of each stat, using the default names:
- HP Health Energy. Run out, and you die.
- MP Magic Points. Consumed when you cast a spell.
- Atk Attack power. Normally determines the damage you do to your enemy.
- Aim Effects whether or not you miss your target.
- Def Reduces the amount of physical (non-magical) damage done to you. Roughly subtracted from the enemy's Atk stat.
- Dog Effects whether or not you dodge the enemy's attack.
- Mag Magic power. Normally determines the damage your spells do.
- Wil Reduces magical damage. Roughly subtracted from the enemy's Mag stat.
- Spd How fast you get your turn. This should usually be within the range of 10-30. A higher number leads to quicker turns.
- Ctr Does nothing. You can use it as an extra stat when Scripting.
- MP~ A percentage by which your MP consumption is reduced. A high MP~ lets you cast a lot more spells. Eg. if this stat is set to 50, spells will cost half as much MP.
- Hits Extra Hits. Causes attacks to be duplicated. For example, a value of 2 means that the hero will hit 3 times every time they do an attack. Use this sparingly- nothing is more annoying that a game where every single hero and every single enemy does 20 hits with each attack.
You can choose exactly how each of these stats effect damage done in the attack editor...
Making Attacks[edit]
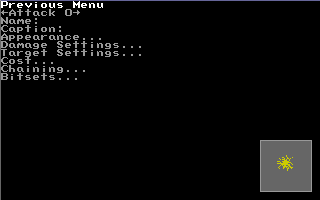
Now go back to the main menu, and pick Edit Attacks
See the twitching fuzzball in the lower right? That is going to be the attack.
Go into the Appearance... menu. First change the palette. I pre-defined a few palettes for you to use. Make it blue or red or something else by changing the Palette number. Normally you would also change the Picture, but in this case the first picture is the one we want.
Set Attack Animation to Projectile. You can also change the Animation Pattern to change the order of the frames in the animation (attacks have 3 frames)
Go back to the attack editing menu.
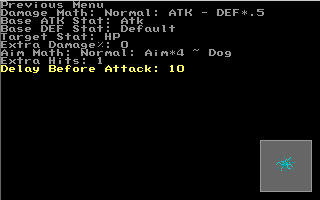
By going into the Damage Settings... menu, you can change the Delay Before Attack option. It is the number of game ticks the character will wait between the time you tell the character to attack, and when they actually do it. I have not calculated it, but I would guess that 10 ticks is about one second.
For most of the attack-stats, you can just leave the defaults. Everything is set up for a normal attack.
And now, this is important, name the attack by going back to the attack editor and typing in a name next to Name:. If you don't name it, there will just be a blank in your heroes battle menu.
Here is a brief explanation of all of the options in each of the attack menus:
- Name the name by which you will identify this attack. Used on your battle menu and spell menus.
- Caption A message which is displayed at the bottom of the screen during the attack.
- Appearance...
- Picture number of the attack graphics used by this attack.
- Palette number the attack picture will use.
- Attack Animation How the attack is drawn. More information is available at What do each of the attack motions do?
- Animation Pattern The order of the frames of the attack animation
- Cycle Forward-- 1,2,3
- Cycle Back-- 3,2,1
- Oscillate-- 1,2,3,2
- Random-- random order
- Attacker Animation The animation that the attacker will use when doing the attack. More information is available at What do each of the attack motions do?
- Display Caption Lets you set how long the caption (if you set one) will display.
- Delay Before Caption Lets you set a delay before the caption appears.
- Damage Settings...
- Damage Math How the damage is calculated.
- Normal-- attacker's chosen attack stat minus half of defender's chosen defence stat.
- Blunt-- 80% of attacker's attack stat minus 10% of defender's defence stat.
- Sharp-- 130% of attacker's attack stat minus all of defender's defence stat.
- Pure-- the value of the attack stat, plain and simple.
- No Damage-- absolutly nozzing!
- HP = 100% of Current-- Changes the target stat to a percentage of current. Change Extra Damage% (below) to change the percentage used. Extra damage of -50 changes this to "HP = 50% of Current". This setting bypasses many of the bitsets.
- HP = 100% of Maximum-- Changes the target stat to a percentage of current. Uses Extra Damage% to decide what percent to use. This setting bypasses many of the bitsets.
- See How is damage calculated? for more information.
- Base ATK Stat Changes the stat that is used in the Damage Formula as attack stat.
- Atk-- most attacks are based on the attacker's attack strength, and blocked by the defender's defence.
- Mag-- makes the damage based on magic, and the defence based on will. Normally used for spells.
- HP-- damage is based on attackers remaining health (healthy hero does more damage, weak hero does less)
- Lost HP-- damage is based on maximum health minus current health (an attacker near death does more damage)
- Random-- a completely random number. Not used much for anything.
- 100-- base stat is 100, used for attacks that do a constant amount of damage regardless of the attacker's stats (especially used for curative items that can also be used outside of battle)
- Any stat-- damage can be based on any stat (yes, that means that HP, atk and def are in the list twice-- thats for backwards compatability)
- last damage to attacker-- base stat is the amount of damage that the last attack to the attacker did, useful for 'revenge' type attacks.
- last damage to target-- base stat is the amount of damage that the last attack to the target did.
- previous attack-- the same base stat as the last attack performed.
- Base DEF Stat Changes the stat that is used in the Damage Formula as attack stat. 'Default' is Wil for Magical attacks (ones that use Mag as the base ATK stat), and Def for physical attacks/otherwise.
- Target Stat Lets you choose which of the target's stats will be damaged (or cured) For information about the Poison and Stun registers, see How do I make a poisoning or stunning attack? Damage done to stats other than HP and MP will go away after the battle ends.
- Extra Damage% modifies the damage done by the attack. It is a percentage of the attacks power that is added to itself. An extra damage of 100 makes the attack twice as strong. 200 makes it three times a s strong. -50 makes it half as strong. -90 makes it 1/10th as strong.
- Aim Math Describes how the chance that an attack hits or is dodged is calculated. See How is the attack dodge rate calculated?
- Normal-- 4 times attacker's aim vs defender's dodge (expect 88% accuracy if equal)
- Poor-- 2 times attacker's aim vs defender's dodge (expect 75% accuracy if equal)
- Bad-- aim vs dodge (expect 50% accuracy if equal)
- Never Misses-- simply enough.
- Magic-- attacker's magic power vs one and a half times defender's willpower (expect 25% accuracy if equal)
- Percentage-- (Aim * (100 - Dodge))%. See How is the attack dodge rate calculated? for more info.
- Extra Hits Lets the attack hit more than one time in succession. Use this in preference to the hero's Extra Hits stat, since it can be chosen on an attack-by-attack basis. Don't be fooled by the 'Extra' (typo?), this is actually the number of times the attack is performed, and 1 is the default value.
- Delay Before Attack the number of ticks that your hero will wait between the time you tell him to do the attack, and when he actually does it.
- Damage Math How the damage is calculated.
- Target Settings...
- Target Class
- Enemy-- used only against your foes. Most normal attacks use this. Note that if an enemy uses the attack, this means that it targets heroes, same for all below.
- Ally-- used only on your friends. This is generally used for healing spells.
- Self-- used only on yourself. These attacks only affect the one who uses them.
- All-- can be used on anyone. Lets the attack hit anyone on the battlefield.
- Ally (including dead)-- used on friends, even if they have zero health. This is most often used for life spells.
- Ally Not Self-- any friend, but not yourself.
- Revenge (last hit)-- the attack targets the last person to attack you (no choice)
- Revenge (whole battle)-- the attack can target anyone who has attacked you so far.
- Previous target-- attacks whoever you targeted last (no choice)
- Recorded target-- attacks the target last recorded with the 'record target' bitset (no choice)
- Dead Allies (hero only)-- used on dead friends. Enemies can't use this because they disappear when they die.
- Target Setting
- Focused-- only one target. A cursor will appear in battle to let you choose who to attack.
- Spread-- everyone in the target class. Will affect all your foes, or all your allies (or everyone if the target class is all)
- Optional Spread-- choice of focus or spread. To choose spread in-game, keep hitting left or right until a cursor appears over all targets.
- Random Focus-- one target, but you don't choose who. When enemies use this it is no different from ordinary focus.
- First target-- first enemy or ally in target class.
- Target Class
- Cost...
- MP Cost used for spells. Makes the attack consume magic points.
- HP Cost used for self-sacrificial attacks. Consumes some of the attackers HP to use.
- $ Cost used for pay-attacks. Consumes some of your party's money. If an enemy uses this attack, the money will come out of what it drops when it dies. This can be used to make an enemy give more money the faster you kill it.
- Chaining...
- Chain to causes another attack to follow immediately after this attack is finished. Can be used to make complex multi-part animations or combination attacks. Only takes effect if Chain Rate% is higher than 0. The chaining attack will also not trigger if the user doesn't have enough MP, HP, etc for it.
- Chain Rate% the percentage of the time that the Chain to attack will be used. Most commonly this is set to 100, so the chained attack will always be used. (note: chaining an attack to itself at 100% is a silly thing to do)
- Bitsets... Lots of options that change the way the attack behaves.
- Cure Instead of Harm -- The attack will increase the target stat instead of damaging it. The stat will not be increased past its maximum unless Allow cure to exceed maximum is turned on. *
- Divide Spread Damage -- causes damage to be evenly divided between targets if more than one target is chosen *
- Absorb Damage-- adds the damage taken from the target to the attacker *
- Unreversable Picture -- the attack graphics will not be mirrored horizontally when the attack is used by an enemy. For example use for animations that include text.
- Steal Item -- attack will attempt to steal an item from the enemy. You can set what items are stealable and the steal success rate in the enemy editor.
- Elemental Damage -- there are eight elemental bitsets that correspond to the elements that an enemy can be strong or weak to. *
- Bonus Vs Type -- there are eight bonus bits that make an attack stronger against enemies of certain types. *
- Fail vs elemental resistance -- Normally when an enemy is resistant to an attack's element, the effectiveness of the attack will be reduced. With these bits you can make it fail completely.
- Fail vs type -- This will cause the attack to fail against certain types of enemies
- placeholders -- free slots in case of future features.
- Show damage without inflicting -- the damage is calculated and displayed, but is not actually dealt. Good for 'scan' type attacks.
- Store target -- stores what ever target is picked for the next attack that uses the Recorded Target target class.
- Delete Stored Target -- deletes a previously stored target.
- Automatically choose target -- A target will be randomly chosen from the target class; the player will not be asked to choose a target.
- Show attack name -- the name of the attack will appear when you use the attack.
- Do not display Damage -- the amount of damage that the attack inflicted does not display. *
- Reset stat to max before hit -- the target stat will be completely restored to its maximum value before the attack does any damage. This is particularly useful for attacks that target stats other than HP and MP.
- Allow Cure to exceed maximum -- turns off the checking that prevents a cure spell from raising a stat above its maximum *
- Usable outside of Battle -- mostly used for curative spells and items
- Damage MP (obsolete) -- causes the attack to damage magic points instead of health points (or cure magic if the Allow Cure bitset is on). This bitset is obsolete. It still works, but it's better to just change the target stat instead. *
- Do not randomize -- disables randomization of damage. For example, if you want a cure to heal 50 HP, you should set this option. *
- Damage can be Zero -- By default the minimum damage that an attack can inflict is 1. This changes the minimum to 0. *
- * -- bitsets marked with an asterisk do not apply to attacks with the damage types that set the target stat to a percentage of its maximum or current value.
(Attacks can be used outside of battles too. See Out-of-battle attacks.)
Creating Enemies[edit]
Now to make some enemies. Go back to the main menu, and pick Edit Enemy Stats
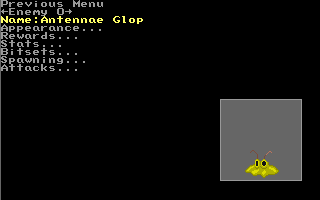
Type in a name for the little booger.
Now pick Appearance... and choose a palette, just like the fuzzball attack. I personally would give it the green palette, but that is just a matter of taste. Go back up a menu and into the Rewards... menu and set gold and experience, but don't bother with the Item stuff, since you have not created any items yet. When you do, you will come here to set what items the enemy will drop after battle, and whether you can steal items off it.
Now go back again and pick Stats... from the enemy menu. The enemy never grows in experience, so there is only one set of numbers. Set them to values that are a little lower than what you gave to your hero.
Just don't make them too much higher than the numbers you gave to your hero, or you will get slaughtered.
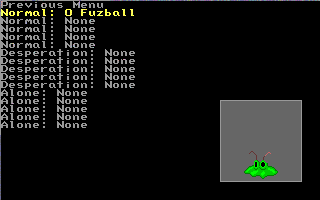
Now back to the enemy menu, and pick Attacks... Set one of the Normal Attacks to be the little twitching fuzzball attack that you made earlier. Then the enemy will attack the same way the hero does.
This is the way an enemy fights:
- Normal -- Default enemy attacks, used when the latter two conditions aren't met. The enemy will resort to standard attacks also if there are no desperation or alone attacks.
- Desperation -- Used if an enemy is almost dead (if its HP is below 20%).
- Alone -- Used if it's the only enemy left alive.
All an enemy really needs is a single standard attack, and it will work.
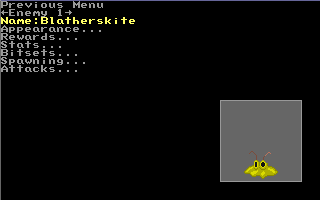
Now make another enemy. Go back to the enemy menu, and switch to the next enemy by pressing right when selecting <-Pick Enemy 0->, which should become <-Pick Enemy 1-> after a prompt for creating a new enemy. Type in a new name.
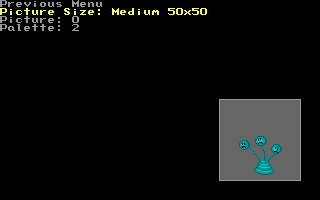
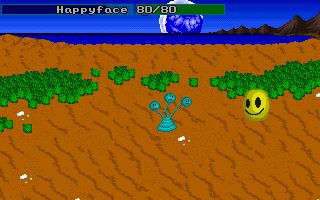
Pick Appearance... Change the Picture Size option. There are three sizes of enemy graphics; small, medium, and big. The size option picks from which set of graphics you can choose the enemy's image. When you change size to Medium 50x50, you will see a three headed thingy as Picture 0.
Go back to the enemy menu, and edit stats to make this enemy different. Maybe give it less power (third number), but more extra attacks (last number)
Since you only have one attack right now anyway, there is no point in changing the second enemy's attacks. Just make sure that it has one normal attack set to the twitching fuzzball attack.
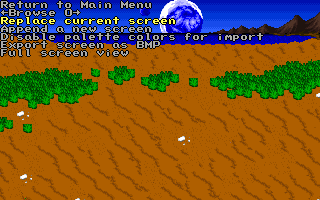
Now, before we create some battle formations, you should have a background. A background is just for looks, it doesn't affect gameplay, but naturally you will want one. Go back to the main menu, then into the Edit Graphics menu, and pick Import screens
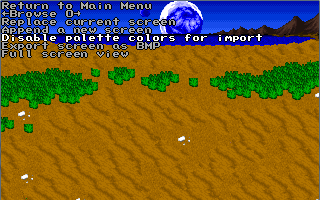
Pick Replace current screen -- you will be replacing the null-black background. If you think you might want to use the blank background for something, then choose Append a new screen instead.
Importing Fullscreen Battle Backdrops[edit]
Now, what would a battle be without a battlefield?
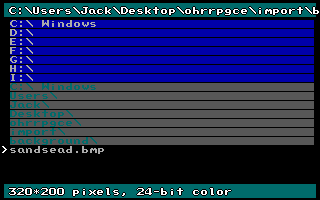
A sample background is packaged with the OHRRPGCE, it's called; sandsead.bmp and can be found in OHRRPGCE/Import/Backgrounds/. You can make your own background in any drawing program, such as PaintShop Pro, Corel PhotoPaint, GIMP, Photoshop, etc... Just make sure that the picture is exactly 320 pixels wide, and 200 pixels tall, and is saved as a 24-bit BMP file.
Pick sandsead.bmp, and it will be imported.
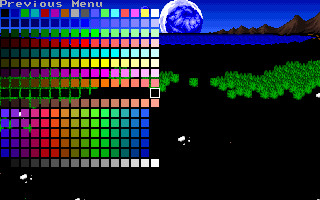
Now this looks perfectly fine, but say it wasn't? Sometimes images get messed up when being translated into 256 colors. This is easy to fix. Pick the Disable Palette Colors option. You will see a big palette showing you all of the available colors.
By highlighting a color and pressing SPACE BAR, you can disable and enable colors. Eliminate the entire brown row. When you do this, you should see most of the picture blacked out.
Now, go back and pick Replace Current Screen, repick sandsead.bmp and the picture will be re-imported. It will now ignore the browns, and use the next best color, orange. However, if you (much like myself) liked it the way is was, simply re-import it once more.
(Note: The very same process of importing is used to import your Title screen. After you have imported a title screen, you can pick it in Edit General Game Data on the main menu)
Creating Battle Formations[edit]
Go back to the main menu and pick Edit Battle Formations
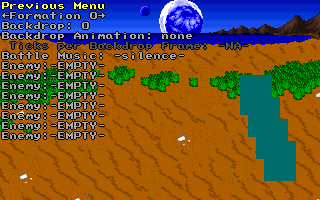
Pick Edit Individual Formations...
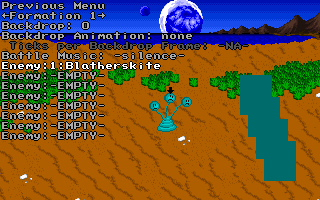
Now you can see the background you just imported. The blue rectangles represent the locations of your party.
You can set the Battle Music number, but it won't do any good until you have imported some BAM, MIDI or OGG files.
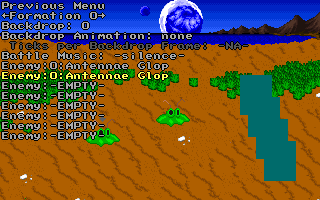
Go to an Enemy:-EMPTY- slot, and press right. Your first enemy should appear. Press ENTER, and you can move him around (hold ALT to move him fast)
Press escape, and set another enemy. You can have up to 8, but I wouldn't recommend setting too many right now, otherwise your hero may get slaughtered. One or two is fine.
Now change the formation number, <-formation 1-> instead of <-formation 0->, and set your second enemy instead. Then edit formation 2, and set a combination of both enemies. Now you have three enemy formations, 0 to 2.
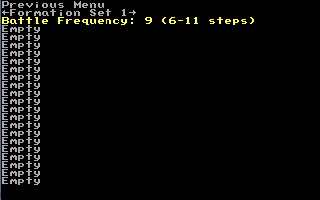
Press ESC, and go back to the formation menu. Pick Construct Formation Sets...
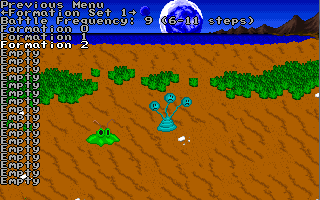
You are editing formation-set 1. Remember that, "1". Set the battle frequency. There is a number, internal to the game, that averages about 100. Every time you step on a spot where an enemy could be, it subtracts the battle frequency from that number, and when that number reaches 0, a battle happens, and the number is reset to another random value. Basically what this value amounts to is the percentage chance that a battle will trigger when this formation set is called.
As you change the battle frequency number, the box containing the ammount of steps until battle also changes, I recommend setting the battle frequency to 9 (which is 6-11 steps), but you can pick whatever you want.
Now, change three of the Empty slots to read Formation 0, Formation 1 and Formation 2. Now, when a battle occurs, it will randomly pick from the three enemy formations that you set up earlier.
Okay. Final Step. Now you have to make the Foe-mapping.
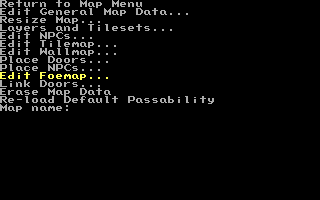
Go back to the main menu, and pick Edit Map Data
Pick Map 00:
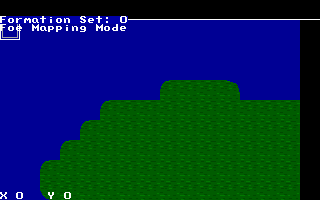
Pick Edit Foemap...
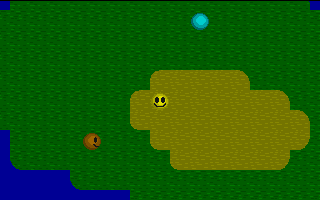
You will see a simple map that has already been created.
See the line Formation Set: 0 in the top left of the screen? Press > to change it to Formation Set: 1
Now you can choose which maptiles you must walk over to fight the enemies you made from the enemy formations you made in formation set one (that you just made)
Move the cursor over the sand, and press SPACE. A "1" appears. Now, whenever you step on that tile, there is a chance of a battle starting (the frequency that you set in the Formation Editor)
Do the same for each tile of the sand.
If you made a mistake, you can correct it. Press < and the Formation Set: 1 in the upper left will become Formation Set: 0 again. Now you can press SPACE to make a tile safe to walk across again.
Now exit CUSTOM.EXE, and run GAME.EXE
Pick SAMPLE, and try out what you have done. You should be able to walk around safely in the grass, but fight enemies when you walk on the sand.
Now is the time to readjust the stats that you gave to your heroes and enemies. If you used the example numbers I gave, the enemies will be too easy because they only do one point of damage per hit. Try giving them more Atk power.
Getting Started | Making Maptiles | Making Walkabout Graphics | Importing Graphics | Map Construction | NPCs | Text Boxes | Tags | Making a Hero | Items | Shops | Customizing Menus | Battles | Stun, Regen, Poison, and Mute | Sound Effects | Animating Maptiles | Zones | Vehicles | Distributing a Game
Bosses | Making Complex Attacks | Combat Dialogues | Enemies that respond to a certain attack | Ways to refer to a hero in a script | Creating Dungeons | Conditional Door Links | Permanent Stat-Boosters | Creating Cutscenes | Using the Mouse in the Game | Making Android games

